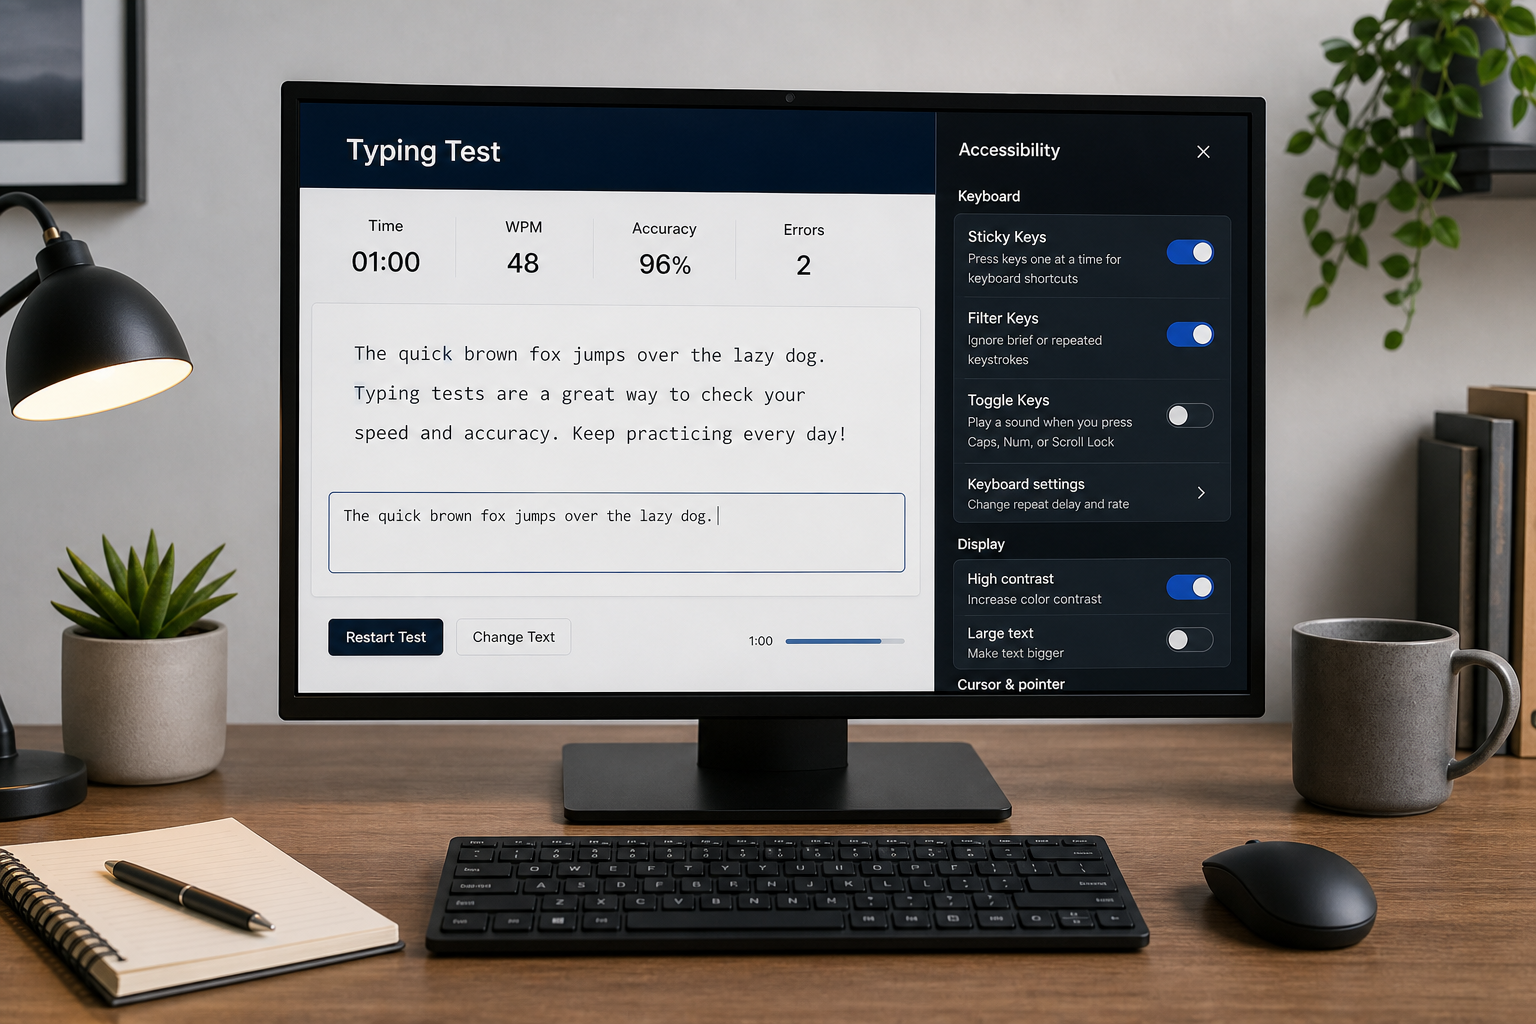
A keyboard typing test is more accurate when your accessibility settings are calibrated before you measure speed. Set repeat delay and repeat rate, decide whether Sticky Keys or Filter Keys should stay on for your workflow, and run a fixed test protocol for 15, 30, and 60 second rounds. That process gives cleaner WPM and accuracy data, especially if you deal with tremor, fatigue, or inconsistent key repeat behavior.
If you want baseline setup steps, pair this with Type Speed Test Keyboard Setup: Build Stable WPM You Can Reproduce. If you compare layouts, keep this open with WPM Typing Test for Layout Switches: QWERTY vs Colemak vs Dvorak. If you need a pacing plan after calibration, use Timed Typing Test Pacing Strategy.
# Why accessibility settings change keyboard typing test outcomes
Typing tests assume stable input behavior. Accessibility settings can alter that behavior in ways that help one user and harm another. The right configuration removes accidental repeats and modifier mistakes. The wrong configuration can suppress intended key presses or introduce timing artifacts.
Three settings groups matter most:
- Repeat delay and repeat rate.
- Modifier assist features such as Sticky Keys.
- Input filtering such as Filter Keys and Bounce Keys equivalents.
At system level, key repeat controls define how long a key must stay down before repeat starts and how fast repeats arrive. That affects held backspace, punctuation corrections, and repeated character bursts. Review your OS documentation before test day, then lock a configuration for at least one week. See Windows keyboard accessibility settings (opens new window), macOS Keyboard settings (opens new window), and GNOME accessibility and keyboard behavior docs (opens new window).
# The calibration protocol for a keyboard typing test
Use one repeatable protocol so your scores reflect skill changes instead of settings drift.
# Step 1: lock your environment
Keep these fixed for the full measurement block:
- Same keyboard hardware.
- Same connection mode (wired or wireless).
- Same operating system account and keyboard profile.
- Same browser and extension set.
- Same text language and punctuation mode.
This avoids cross variable noise that makes trend interpretation weak.
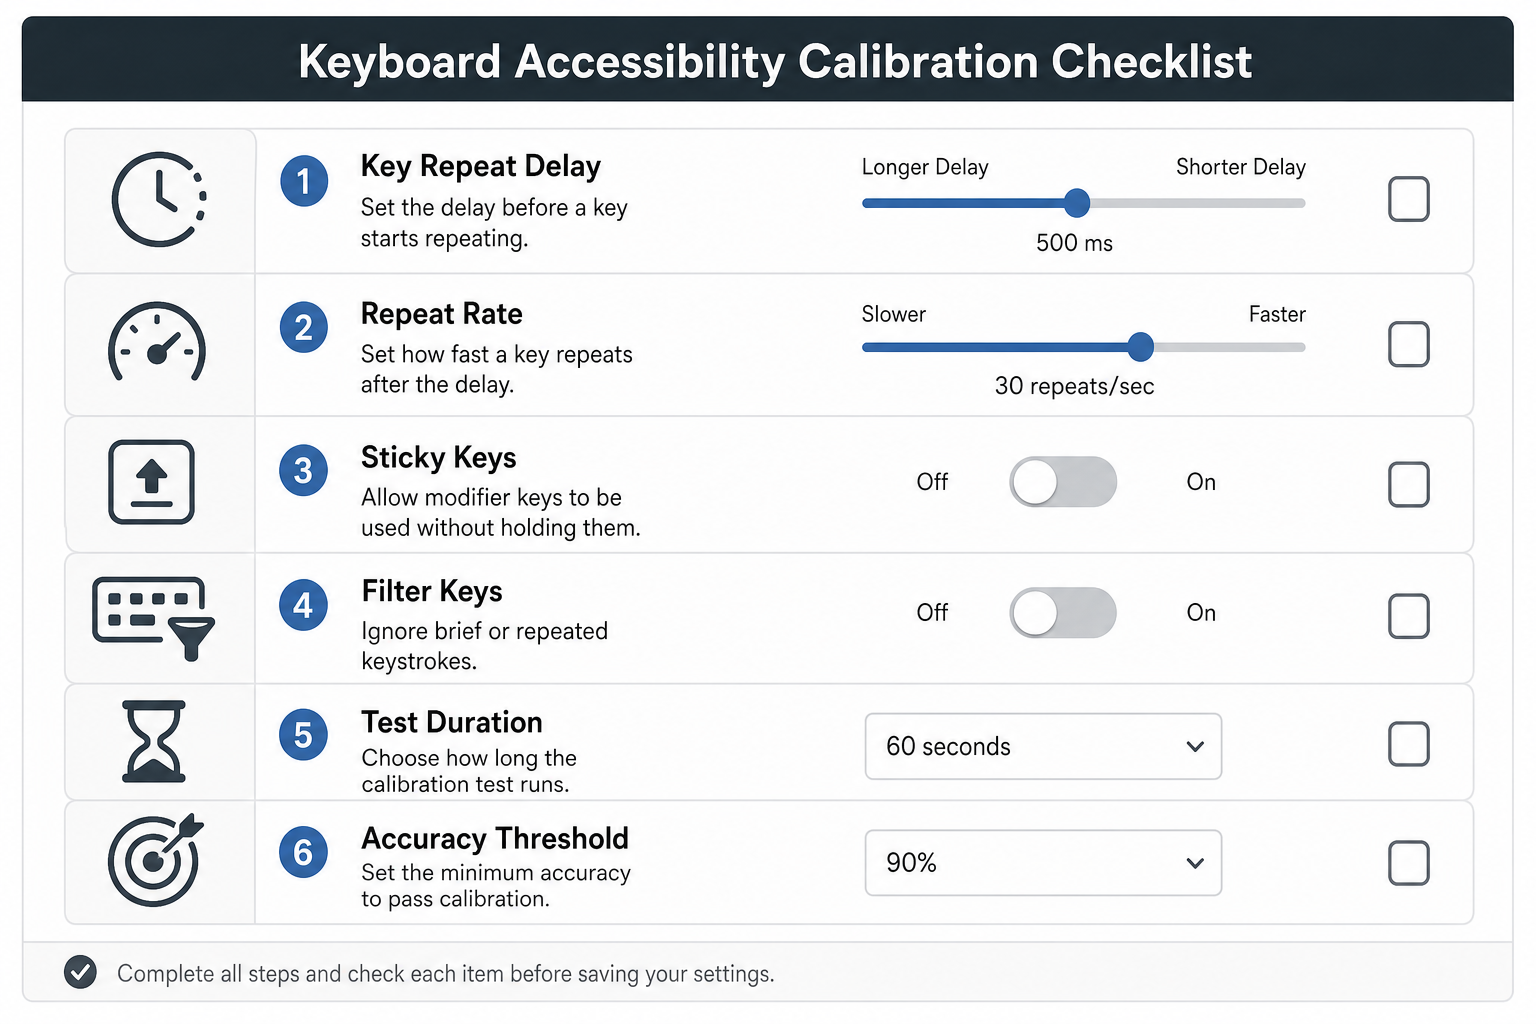
# Step 2: choose accessibility defaults for your needs
Start with this initial setup:
- Sticky Keys off unless you rely on one key at a time modifier entry.
- Filter Keys off unless you need accidental repeat suppression.
- Repeat delay set to middle range.
- Repeat rate set to middle range.
Then test practical typing sequences that match real work:
- Mixed words and punctuation.
- Sentence boundaries with shift usage.
- Backspace correction bursts.
If you repeatedly miss modifier combinations, enable Sticky Keys and re test. If accidental double presses dominate, enable filtering and re test. Keep one change per session so effects stay measurable.
# Step 3: run controlled test rounds
Run nine rounds per session:
- Three rounds at 15 seconds.
- Three rounds at 30 seconds.
- Three rounds at 60 seconds.
Rest 60 to 90 seconds between rounds. Record WPM, accuracy, corrected errors, and uncorrected errors.
# Step 4: evaluate with a fixed decision rule
Do not chase a single personal best. Use medians over a seven day block.
Use this acceptance checklist before promoting a new accessibility profile to daily default:
- Median 60 second WPM is stable or improved.
- Accuracy improves by at least 0.5 percentage points, or remains within normal variance.
- Corrected errors decrease.
- Modifier mistakes decrease on punctuation heavy lines.
- Subjective fatigue stays equal or lower by session end.
If two or more items fail, revert and test a different setting pair.
# Decision table: what to adjust when your scores look unstable
Use this table after at least three sessions.
| Observed pattern | Likely setting issue | Adjustment to test next | Validation window |
|---|---|---|---|
| WPM spikes in 15 second runs, drops in 60 second runs | Repeat rate too aggressive for sustained control | Lower repeat rate one step | 3 sessions |
| Accuracy drops on punctuation heavy text | Modifier entry friction | Enable Sticky Keys or train modifier timing | 3 sessions |
| Frequent accidental double letters | Repeat delay too short or bounce effect | Increase repeat delay or enable filtering | 3 sessions |
| High corrected errors with stable raw WPM | Backspace repeat behavior too fast | Reduce repeat rate and compare correction cost | 3 sessions |
| Flat WPM with improved comfort | Input filtering removes noise | Keep profile and extend test window | 7 sessions |
# Practical examples: three user profiles
These examples show how calibration choices differ by typing context.
# Profile A: office writer with modifier errors
Symptoms:
- Strong raw speed.
- Frequent Shift and punctuation misses.
- Accuracy drops in paragraph tests.
Settings strategy:
- Sticky Keys on for trials.
- Repeat delay unchanged.
- Repeat rate unchanged.
Outcome pattern to watch:
- Lower modifier error count in 30 and 60 second rounds.
- Similar or slightly lower 15 second burst WPM.
Interpretation:
If accuracy rises and corrected errors fall, keep Sticky Keys for production writing, even if short burst WPM softens.
# Profile B: user with accidental double presses
Symptoms:
- Frequent duplicated characters.
- Excess backspacing.
- Good rhythm on clean lines.
Settings strategy:
- Increase repeat delay one step.
- Keep repeat rate at mid range.
- Optionally enable filtering if duplicates persist.
Outcome pattern to watch:
- Sharp drop in corrected errors.
- Small initial WPM dip that recovers over several sessions.
Interpretation:
A short adaptation dip is acceptable if sustained accuracy and throughput improve.
# Profile C: high speed user with fatigue drift
Symptoms:
- Fast first run.
- Larger decline by minute long rounds.
- Rising error rate late in sessions.
Settings strategy:
- Lower repeat rate one step to reduce correction cascades.
- Keep delay stable.
- Add fixed rest intervals.
Outcome pattern to watch:
- Smaller speed drop between 15 and 60 second medians.
- Better end of session accuracy.
Interpretation:
You are optimizing reliable throughput, not only launch speed.
# How to log results so your keyboard typing test data stays useful
A simple log structure is enough. Keep the same columns every day:
- Date.
- Session start time.
- Accessibility profile label.
- Duration (15, 30, 60).
- WPM.
- Accuracy.
- Corrected errors.
- Uncorrected errors.
- Notes on discomfort or interruptions.
Use one profile label per block, for example:
base-mid-delay-mid-ratesticky-mid-delay-mid-ratefilter-high-delay-mid-rate
That naming keeps comparisons clean.
If you also compare devices, keep method boundaries clear. Use Keyboard Speed Test Split Analysis for segment level review and Typing Test WPM Normalization when durations differ.
# External standards and docs worth using during setup
When you tune settings, primary documentation beats forum advice. Start with these:
- Microsoft accessibility keyboard options for Windows behavior and toggles: support.microsoft.com (opens new window)
- Apple keyboard settings reference for repeat controls and modifier behavior on macOS: support.apple.com (opens new window)
- GNOME keyboard help for Linux desktop defaults and accessibility options: help.gnome.org (opens new window)
- W3C keyboard event definitions for understanding key behavior in web apps: w3.org UI Events KeyboardEvent code (opens new window)
These sources answer different layers of the same problem. OS docs define input behavior. Web standards define event interpretation in browser based typing tools.
# Common mistakes that invalidate keyboard typing test conclusions
# Changing settings mid week
If you change repeat rate every day, trend lines become uninterpretable. Hold one profile for at least three sessions.
# Comparing only short tests
15 second rounds can hide correction cost and fatigue. Include 60 second rounds in every session.
# Ignoring corrected error load
Two profiles can show similar WPM while one profile burns more backspaces. Track corrected errors as a first class metric.
# Mixing content difficulty without labeling
Simple word lists and punctuation heavy passages stress different skills. Tag each run by passage type.
# Treating comfort notes as optional
Discomfort often predicts future error growth. Log it.
# A seven day starter plan you can run today
Day 1:
- Establish baseline with defaults.
- Run nine rounds.
Day 2:
- Keep baseline profile.
- Repeat full protocol.
Day 3:
- Adjust one variable only, usually repeat delay.
- Run full protocol.
Day 4:
- Keep Day 3 profile.
- Compare medians vs Day 1 and Day 2.
Day 5:
- If modifier errors persist, test Sticky Keys variant.
- Keep other settings fixed.
Day 6:
- Keep best performing profile from Day 3 to Day 5.
- Run full protocol.
Day 7:
- Final comparison of two best profiles by 60 second median WPM, accuracy, and corrected errors.
This produces enough data to pick a stable profile without over engineering.
# When to re calibrate
Re calibrate if one of these changes happens:
- New keyboard hardware.
- New operating system major version.
- Persistent hand fatigue or tremor change.
- Major workflow shift to punctuation dense writing.
Treat re calibration as a short new block, then return to your standard test routine.
A keyboard typing test is useful when your input settings are deliberate and stable. Calibrate once, validate with data, and keep the profile that improves sustained throughput with lower correction cost. When you run that process in TypeTest, your WPM and accuracy trends become actionable for real writing work, not just leaderboard snapshots.